Installing Automatic1111 (Stable Diffusion WebUI) on Windows allows you to easily generate stunning images using Stable Diffusion models through a user-friendly web interface.
Rather than dealing with complex command-line operations, Automatic1111 simplifies the entire process, making it accessible to both beginners and advanced users alike. In this guide, we will walk you through the step-by-step process of setting up Automatic1111 on your Windows system, from downloading the required files to configuring your environment for seamless image generation.
Whether you’re a digital artist or an AI enthusiast, this installation guide will help you unlock the creative potential of Stable Diffusion on your Windows machine.
System Requirements
- Operating System: Windows 10 or higher
- GPU: Nvidia video card with at least 4 GB VRAM
- Python: Version 3.10.6 (not 3.11 or later)
Table of Contents
Step-by-Step Installation
Step 1: Install Python
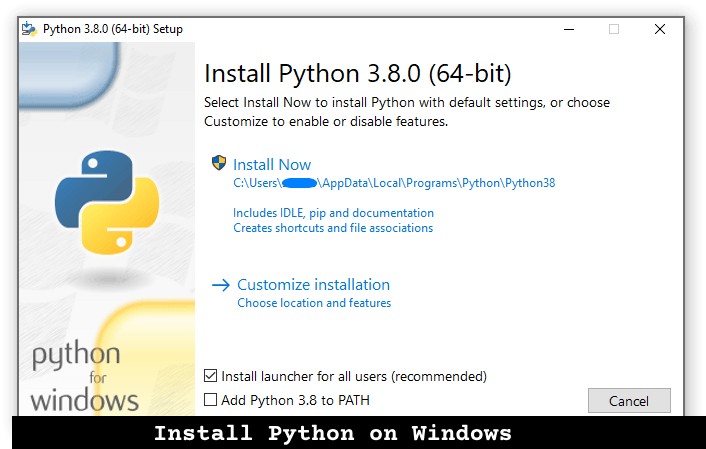
- Download Python:
- You can download Python from the Microsoft Store or from the official Python website. If you choose the installer, ensure you check the box that says “Add Python to PATH” during installation.
- Uninstall Old Versions:
- Go to Control Panel > Add or Remove Programs and uninstall any previous versions of Python.
- Verify Installation:
- Open Command Prompt by pressing the Windows key and typing
cmd. - Type
pythonand press Enter. You should see Python 3.10.x. If not, restart your PC or reinstall Python.
- Open Command Prompt by pressing the Windows key and typing
Step 2: Install Git
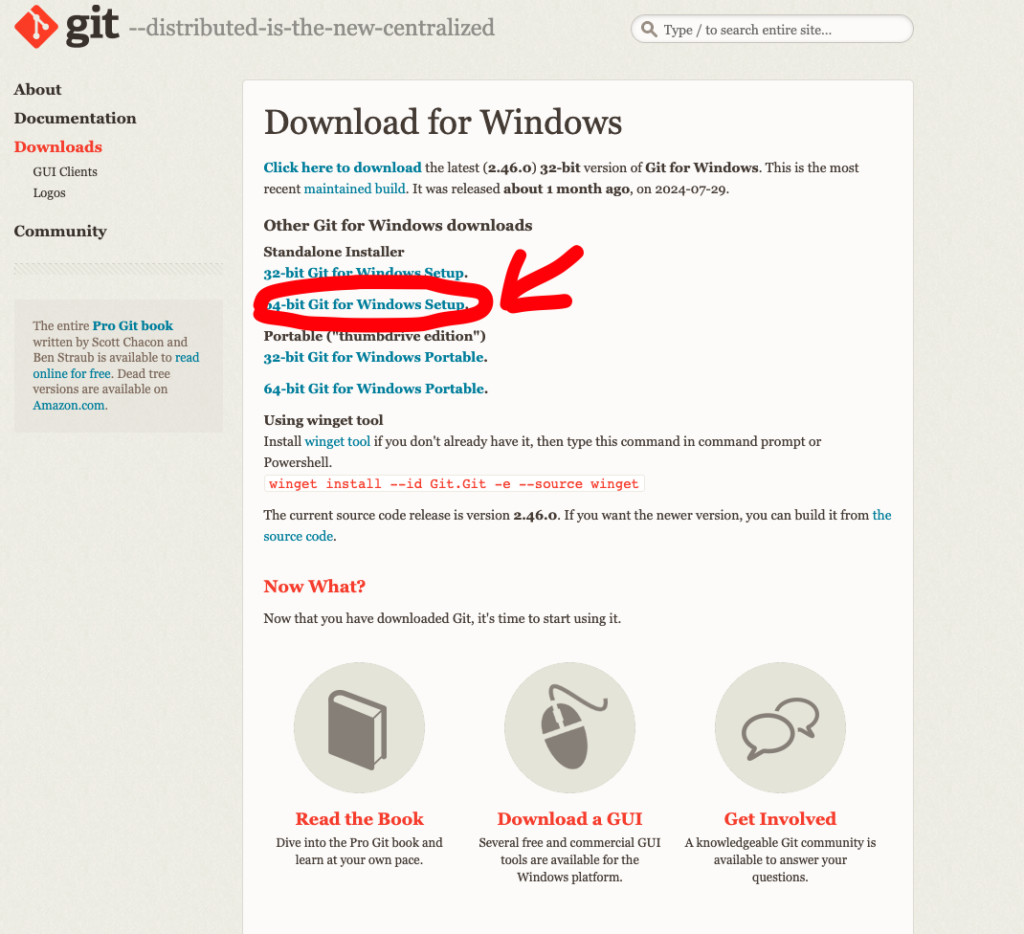
- Download Git:
- Visit the Git website to download the installer.
- Install Git:
- Open the downloaded file and follow the on-screen instructions to install Git.
Step 3: Download Automatic1111
- Open Command Prompt:
- Press the Windows key and type
cmdto open Command Prompt.
- Press the Windows key and type
- Navigate to Home Directory:
- Type
cd %userprofile%and press Enter to ensure you are in your home folder.
- Type
- Clone the Repository:
- Type the following command and press Enter:text
git clone https://github.com/AUTOMATIC1111/stable-diffusion-webui.git - This will create a folder named
stable-diffusion-webuiin your home directory.
- Type the following command and press Enter:text
Step 4: Install Dependencies
- Navigate to the Folder:
- Change to the new directory by typing:
cd stable-diffusion-webui
- Change to the new directory by typing:
- Install Required Packages:
- Run the following command to install the necessary Python packages:
pip install -r requirements.txt
- Run the following command to install the necessary Python packages:
Step 5: Download a Model
- You will need a Stable Diffusion model file (e.g.,
v1-5-pruned-emaonly.ckpt). You can find models on sites like Hugging Face or the official Stable Diffusion repositories. Place the model file in themodels/Stable-diffusiondirectory within thestable-diffusion-webuifolder.
Step 6: Run Automatic1111
- Start the Web UI:
- In the Command Prompt, type:
webui-user.bat - This will launch the Automatic1111 interface.
- In the Command Prompt, type:
- Access the Interface:
- Open your web browser and go to
http://127.0.0.1:7860to access the Automatic1111 interface.
- Open your web browser and go to
Additional Resources
For visual learners, here are some helpful video tutorials:
- How to Install Automatic1111 in 1 Click: A straightforward video demonstrating a non-technical installation method.
- Comprehensive Installation Guide: Look for videos that provide step-by-step instructions for installing Automatic1111.
By following these steps, you should be able to successfully install and run Automatic1111 on your Windows machine.