Running a Large Language Model (LLM) has become more accessible with the advent of user-friendly platforms like LM Studio. If you’re wondering how to run LLM with LM Studio, this article will guide you through the process step-by-step.
Whether you’re a researcher, developer, or just curious about natural language processing (NLP), LM Studio offers a streamlined way to experiment with powerful language models. This guide will cover everything from installation to configuration and running your first LLM project in LM Studio.
Read more: Best GPU Servers for Deep Learning
Table of Contents
What is LM Studio?
LM Studio is a powerful yet user-friendly platform designed to facilitate the training and deployment of large language models. It simplifies the complexities involved in working with LLMs, providing a graphical interface and integrated tools that make it easier to build, fine-tune, and run language models for various applications.
From chatbots and virtual assistants to content generation and language translation, LM Studio is designed to handle diverse NLP tasks. With its intuitive interface, even those new to machine learning can experiment with LLMs without getting overwhelmed by the technical details.
Why Use LM Studio for Running LLMs?
The popularity of large language models has exploded in recent years. According to a recent report, the global NLP market is projected to grow from $11.6 billion in 2020 to $35.1 billion by 2026, with a significant part of this growth driven by the adoption of LLMs in various sectors. LM Studio addresses the growing demand for tools that simplify the process of working with these models. It offers several key benefits:
- Ease of Use: LM Studio provides a graphical interface that simplifies model training, evaluation, and deployment.
- Integration: It supports integration with popular data sources and machine learning frameworks.
- Scalability: LM Studio is designed to handle models of various sizes, from small prototypes to large, production-ready systems.
- Efficiency: It includes tools for optimizing models and reducing computation costs.
In the following sections, we’ll dive into how to run LLM with LM Studio, step-by-step.
How to Run LLM with LM Studio: Step-by-Step Guide
Step 1: Install LM Studio
To begin using LM Studio, you need to install the software on your system. Here’s how:
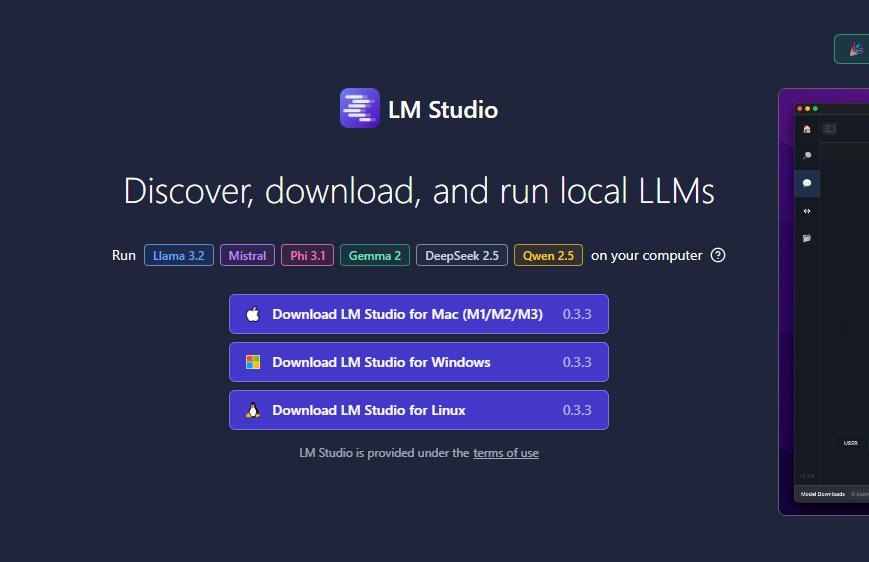
- Visit the LM Studio Website: Go to the official LM Studio website and download the installer that matches your operating system (Windows, macOS, or Linux).

2. Run the Installer: Follow the on-screen instructions to install LM Studio. Make sure you have enough disk space and a stable internet connection, as the installation process may require downloading additional dependencies.
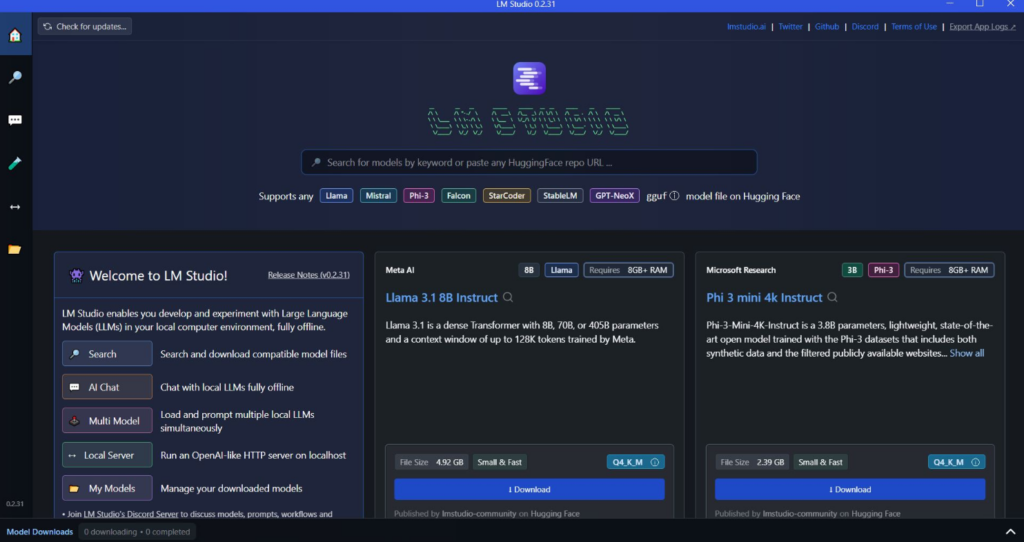
3. Launch LM Studio: Once installed, open the software. You will be greeted with the main dashboard, which serves as the control center for all your LLM projects.

Step 2: Setting Up Your Environment
Before running an LLM, it’s essential to set up your environment. This involves configuring hardware resources, data sources, and choosing the appropriate language model.
- Hardware Configuration: Depending on the size of the model you plan to run, you may need a machine with high computational power. For smaller models, a standard desktop with a good GPU will suffice. For larger models, consider using cloud-based resources or a dedicated machine.
- Data Sources: If you’re fine-tuning a model, you’ll need to load your training data into LM Studio. This can be done by importing datasets from local files or integrating with data storage solutions like Google Cloud Storage or AWS S3.
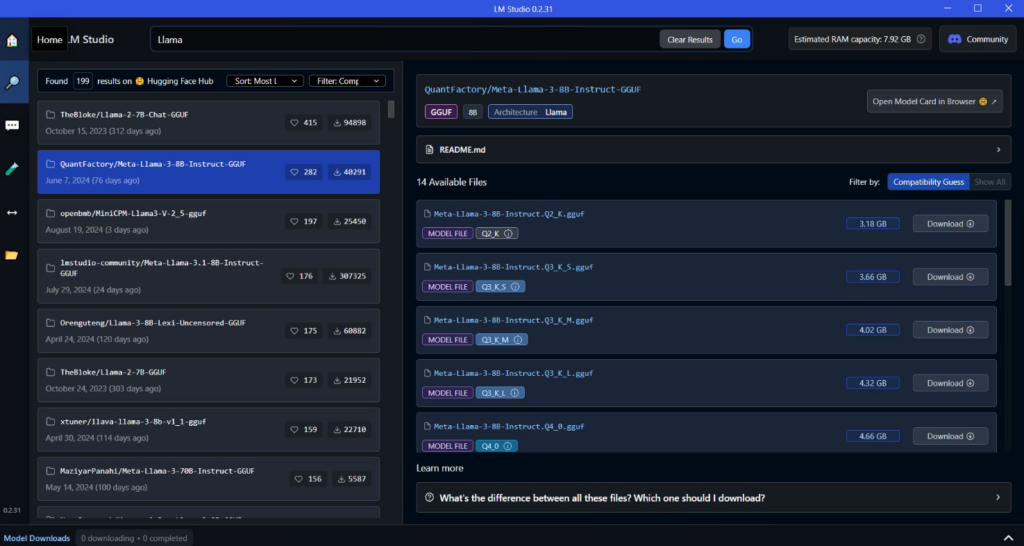
- Model Selection: LM Studio provides a range of pre-trained models you can start with. You can also import your custom models. Select a model that suits your application, whether it’s text generation, sentiment analysis, or another NLP task.
Step 3: Loading and Configuring Your LLM
Now that your environment is set up, it’s time to load and configure your LLM.
- Import or Select a Model: From the LM Studio dashboard, click on the “Models” tab. You can choose from pre-trained models available in the library or import your own. For beginners, starting with a model like GPT-4 or BERT can be a good idea.

2. Configuration Settings: Click on the model you’ve selected to open the configuration panel. Here, you can adjust settings like batch size, learning rate, and epochs. If you’re fine-tuning the model, you’ll need to specify the dataset and optimization parameters.
3. Model Parameters: Set the parameters according to your project needs. For example, if you’re working on a text summarization task, you might want to limit the maximum token length to prevent excessively long outputs.
Step 4: Training or Fine-Tuning the Model
If you’re using a pre-trained model as-is, you can skip this step. However, if you’re customizing the model for a specific task, you’ll need to train or fine-tune it.
- Load the Dataset: Go to the “Datasets” section and import your dataset. LM Studio supports various formats like CSV, JSON, and plain text.
- Start Training: Navigate back to the “Training” tab and click “Start Training.” The software will display real-time metrics like loss, accuracy, and training time. You can pause or stop the training at any time.
- Save Checkpoints: It’s good practice to save checkpoints periodically. This allows you to resume training from a specific point without starting over if something goes wrong.
Step 5: Running Inference

Once your model is trained or fine-tuned, the next step is to run inference. This is where the model generates outputs based on the inputs you provide.
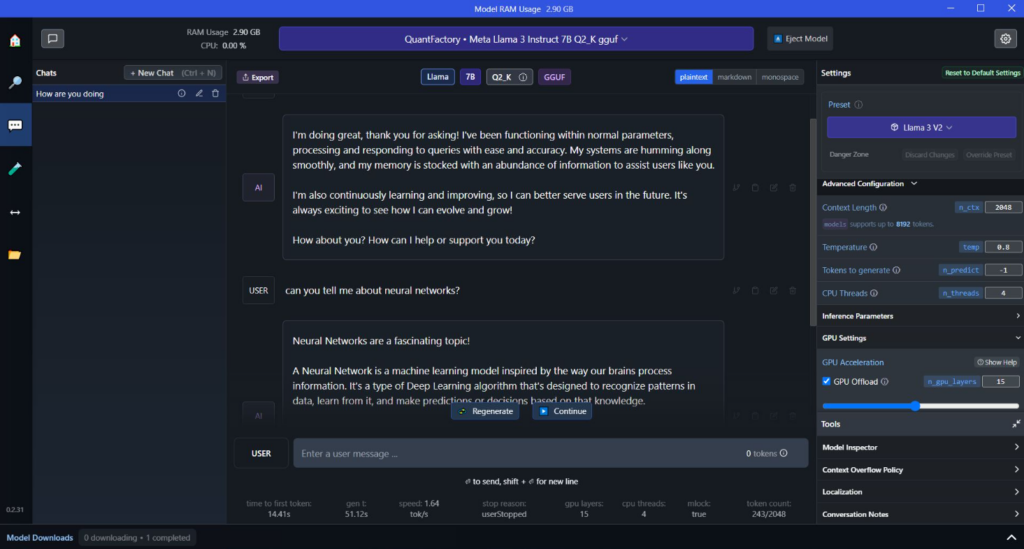
- Inference Mode: Switch to “Inference Mode” in the LM Studio dashboard. Here, you can enter text prompts or questions, and the model will generate responses.
- Batch Inference: If you have multiple inputs, you can use batch inference to process them all at once. Upload a file containing your inputs, and LM Studio will generate a corresponding output file.
- Evaluate the Results: Review the outputs generated by the model. If you’re not satisfied with the performance, you may need to fine-tune the model further or adjust the configuration settings.
Step 6: Exporting and Deploying the Model
After running successful inferences, you may want to deploy your model for real-world applications.
- Export the Model: LM Studio allows you to export models in various formats, such as TensorFlow, PyTorch, or ONNX. Choose the format that best suits your deployment environment.
- Integrate with Applications: You can integrate the exported model with web applications, mobile apps, or enterprise software. LM Studio provides API support for easy integration.
- Deploy to Cloud or Edge Devices: Depending on your needs, you can deploy the model to cloud platforms like AWS or Google Cloud, or to edge devices for offline use.
Step 7: Monitoring and Maintenance
Once your model is deployed, it’s crucial to monitor its performance and update it as needed.
- Performance Monitoring: Use LM Studio’s built-in monitoring tools to track metrics like response time, accuracy, and resource usage.
- Model Updates: As new data becomes available or if the model’s performance degrades, you may need to retrain or fine-tune the model. LM Studio makes it easy to update models without extensive downtime.
- Scalability: If your application grows in usage, you may need to scale your model’s deployment. Consider using auto-scaling features in your cloud provider or adding more resources to your local deployment.
Common Challenges and Troubleshooting Tips
Working with large language models can sometimes be challenging. Here are some common issues and solutions to keep in mind while running LLM with LM Studio.
Issue 1: Out-of-Memory Errors
Large models can consume significant memory resources. If you encounter out-of-memory errors, try reducing the batch size or using a smaller model. You can also leverage cloud services with higher memory capacity.
Issue 2: Long Training Times
Training LLMs can be time-consuming. To reduce training time, consider using pre-trained models and fine-tuning them instead of training from scratch. Using powerful GPUs or distributed computing resources can also speed up the process.
Issue 3: Inaccurate Predictions
If your model is not performing as expected, it could be due to poor data quality or incorrect configuration settings. Make sure your training data is well-preprocessed and the model parameters are correctly set for your specific task.
Issue 4: Deployment Issues
Deploying large models can be complex, especially if you’re working with limited resources. Ensure that your deployment environment meets the necessary requirements and that you’ve chosen the appropriate model format.
Use Cases for Running LLM with LM Studio
Understanding how to run LLM with LM Studio opens up numerous possibilities for various applications. Here are some popular use cases:
1. Content Creation
Content creators can use LLMs to generate articles, blog posts, or even creative stories. With LM Studio, you can fine-tune models on specific writing styles or topics to produce coherent and engaging content.
2. Customer Support
LLMs can be used to automate customer support by providing accurate responses to common queries. By training a model with LM Studio on historical customer data, businesses can create chatbots that handle basic inquiries, reducing the workload on human agents.
3. Language Translation
Language translation models can be fine-tuned using LM Studio to provide more accurate and context-aware translations. This is especially useful for businesses operating in multilingual environments.
4. Sentiment Analysis
Companies can use LLMs to analyze customer feedback and social media posts to gauge public sentiment. By running sentiment analysis models in LM Studio, organizations can gain insights into customer opinions and trends.
5. Code Generation
Developers can use LLMs to assist in code generation, error detection, and documentation. LM Studio enables fine-tuning models to understand specific coding languages or frameworks, streamlining software development tasks.
Advanced Tips for Running LLM with LM Studio
If you’re looking to get the most out of LM Studio, here are some advanced tips to consider:
- Hyperparameter Tuning: Experiment with different hyperparameters like learning rate, dropout rate, and batch size to optimize model performance.
- Transfer Learning: Use transfer learning techniques to adapt pre-trained models to your specific domain, reducing the amount of data required for training.
- Model Compression: Utilize techniques like quantization and pruning to reduce the size of your model, making it more efficient for deployment.
- Experiment Tracking: Use LM Studio’s experiment tracking feature to keep a record of different model versions, configurations, and performance metrics. This helps in replicating results and comparing different models.
Related Resources and Further Reading
For those looking to deepen their understanding of how to run LLM with LM Studio, here are some related articles and resources:
- Introduction to Language Models
- Fine-Tuning Techniques for NLP
- Deploying NLP Models on AWS
- Optimizing Language Models for Production
Conclusion
Knowing how to run LLM with LM Studio can significantly enhance your ability to work with large language models, whether you’re developing applications, conducting research, or exploring new NLP capabilities. LM Studio’s intuitive interface, powerful features, and robust support for various models make it an excellent choice for both beginners and advanced users. By following this guide, you’ll be well on your way to leveraging the full potential of LLMs in your projects.
